Most if not all of my cards and press print products use clipping masks. I feel it’s just easier. But what do you do when you find a frame that has an open end on it and you still want to use a clipping mask? In this Photoshop tutorial I will show you what to do. It’s super easy and it’s a method I use when there is an open end. I will include a free frame of mine at the end of the tutorial. I use CS4 for all of my designing so the shortcuts might be different depending on what program you are using.
Steps.
1. First open your frame and a full size photo. Then minimize your photo. We want only the frame window open. All of my frames unless they are the vintage frames will be black. For this one I will use this frame.
2. Duplicate your frame by hitting CTRL-J.
Then you want to hide your top frame. To do this just hit the eye and it will go away.
3. Select your bottom layer and then hit Shift-CTRL-N at the same time and you will get a new, blank layer on top of your frame. Keep your top layer hidden at this time. This is the layer where we will close the frame to add the clipping mask.
4. Select your brush tool and choose a color, any color. I like purple so I picked purple. It’s up to you really as long as it’s not Black, White or Gray.
5. On your blank layer you want to make your brush a hard brush and about 150 size and then go around to all of your open ends and put a circle where you want to close the frame. It’s important to make sure your circle overlaps the two black curlies. This will close the frame and make it so we can fill the entire area grey where we want our picture to go. Practice this step a few times.
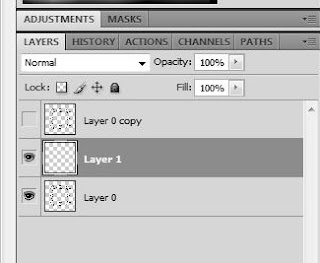
6. A shortcut I like to do to merge the layers is Shift-CTRL-E at the same time. You have to click on the layers you want to merge and then hit Shift-CTRL-E and it will merge your layers. You should see your layer in your layer palette look like this now.
7. The next step is to grab your magic wand tool and click in the middle of your frame. You should see some marching ants now. Then you want to go up to Edit>Fill and choose 50% Gray. I always choose this selection. But it’s up to you what you want to use. I just find it’s easier for me.
8. Then with the gray area still selected I will hit CTRL-J to duplicate just the gray area. Your marching ants will go away and you will now have 3 layers. It should look something like this.
9. Click on your bottom layer in the gray area with your magic wand and then hit delete. This will delete your entire gray area on that layer. You will still see the gray and that is because of the layer above it is filled. If you want you can turn off that layer before deleting on your bottom layer. Then hit CTRL-D to un select your area.
10. Then go back to your bottom layer and use your magic wand tool to select the purple dots and hit delete. You will still have the marching ants around where your purple dots were so go ahead and hit CTRL-D to unselect them. Now you should have some of your black part missing so go to your top layer and unhide it. Move your top layer to where it is sitting right on top of the bottom layer and select Shift-CTRL to select both of the layers and then CTRL-E to merge the layers.
11. Now select your gray layer and hit CTRL-N to create a new layer. When the dialog box pops up you will want to name that layer (I name my Place Photo Below This Layer) and check the Use Previous Layer to Create Clipping Mask and hit OK. Sometimes if I have a lot of layers I will color code them so you will know where your clipping mask layer is. But it’s up to you. Then hit OK.
12. You should have 3 layers now. The top one will have a little arrow pointing down to let you know that your photo layer is right underneath of it. Go ahead and name that layer PHOTO. This layer MUST be selected before you try to move your photo into it. So go back to your layers and select the PHOTO layer.
13. Now with your PHOTO layer selected all that is left is to place your photo into your frame so click on your minimized photo to bring it up and select your arrow tool. Click on your photo name in the work space and drag your photo down.
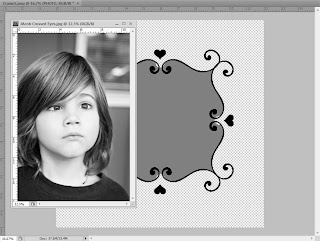
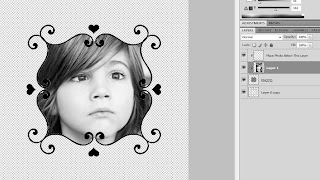
14.With your arrow tool still selected and your PHOTO layer blued, move your photo. Your layers should look like this now, but in color of course. Now move your photo around to where you want it. To re size simply select CTRL-T and then with the Shift selected grab one of your corners and pull up or down until it fills the entire area. Make sure to keep SHIFT selected the whole time to keep image quality. If you mess up your circles or find that it erased too much start over. Keep practicing and you will have it down in no time! Remember to move your purple circle around to see what you come up with. Once you have your photo where you want it then you can select Shift-CTRL to select all of your layers with your cursor and then CTRL-E to merge all of your layers.
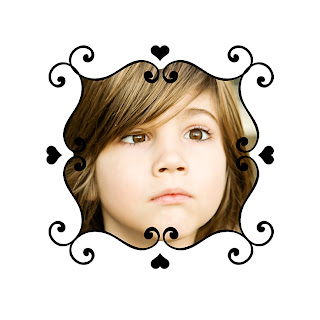
And now for the frame. For the GIANT size frame, right click and open in new tab and click on frame to maximize. Then right click and save. It will save as a PNG. Questions? Comments? Let me know if this tutorial works for you. Enjoy!





Thank you so much!! I want to start creating some of my own templates and this was a piece of info that I was missing. Do you create all of your own frames too!?
You are so welcome. I hoped that someone would benefit from this. It’s seriously really easy when you finally figure it all out. I make all of my own frames too. I have a vintage frame collection I am working on right now that I will be selling with a commercial use license for it.