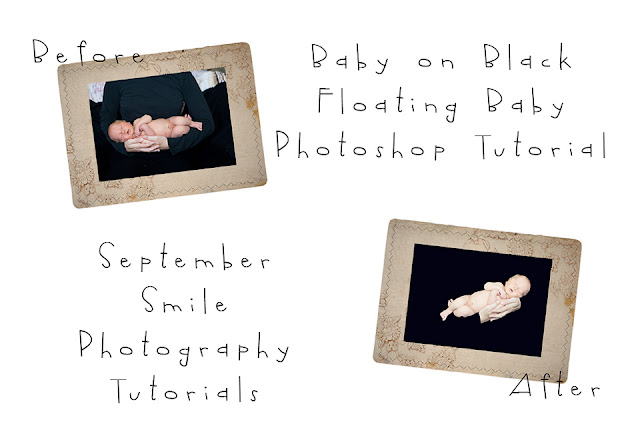
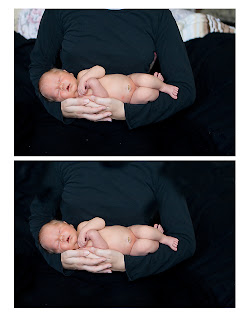
If you’ve been a photographer for any amount of time chances are you might photograph a newborn one day. I didn’t photograph a single newborn until I had my daughter but hey, better late than never right? I wanted to make sure that I fully understood newborn photography and that most photos are composites. One photo I always loved was the newborn “floating” photo. Or baby on black background. Some people like it, some hate it. I try to get at least one during each session. I’ve gotten a few emails asking me an easy way to do it. So I have made this step-by-step, with photos tutorial. Please click on images to enlarge. I hope you like it!
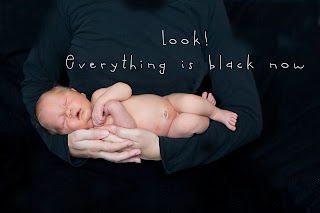
Open your photo. I chose this one. This really is just a SOOC resized and converted for web.
What you will notice about this photo is that the mom is wearing a black long sleeve shirt and she’s got a black piece of fabric on her lap. Don’t worry about the background because in the next step we are going to CLONE onto the areas that aren’t fully black.
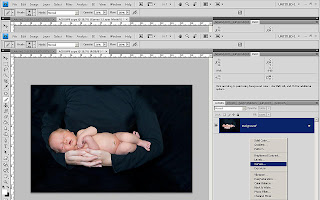
START YOUR CLONING
Find your clone brush in your tools and select either a hard brush or a soft edge and then a black area on your photo. It doesn’t matter how black it is because eventually we will make it all black. This is what I started with:
This is what I ended with. Make sure to zoom in to see if you have any stray areas that might be white. I noticed on this photo that there were white dots. I’m guessing from the cheesecloth I used on another pose from this session. You can either go all out crazy and remove them all or just look for the super big ones. Either way we will get them all in the end.
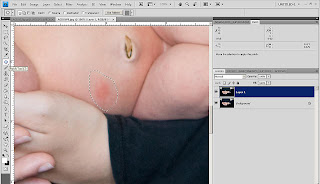
At this point you can work on your baby and hands edits. This little one had a few areas that needed to be retouched so I duplicated my layer (CTRL-J) and grabbed my trusty patch tool and used that to clean him up a little. I use just my patch tool for about 95% of my editing on skin. I just like it. Sometimes I will use my clone or one of the other tools but mainly I use my patch tool. Also make sure to zoom in to 100% when editing skin. It makes a world of a difference.
This is what I ended up with after some light patching. He had pretty amazing skin so I didn’t have to do much. I think I had to remove the mark on his belly and he had a little scratch on his cheek and right above his eye.
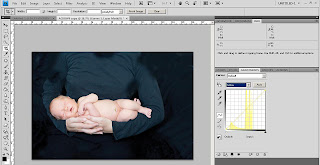
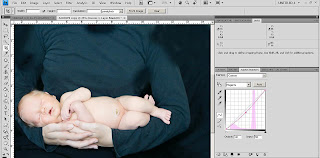
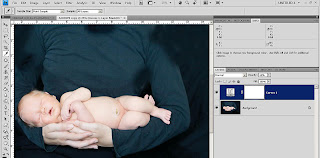
Next, he looks a little underexposed AND yellowish. I know some babies are all different colors and I like to keep them a little more natural looking and close to their true colors. I see so many babies that are almost white, pale, purple skin. YUK. The FIRST thing I am going to do is to make a CURVES adjustment layer.
I kind of eyeball it from here. I just select the middle point and nudge it up with my up arrow key. For this image I nudged the output to 159 and then over to the left a little so the input is 116.
It’s totally up to you what you want to do. I like my baby skin to be brighter because it’s easier for me to mask it back if it’s too bright or anything like that. To see if it’s too much turn off your curves layer to see the original photo. I thought mom’s hands were a bit too bright so I selected my black paint brush, lowered the opacity to 20% and “painted” her hands back to a less bright.
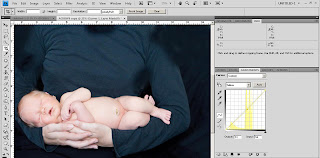
I sometimes will use CMYK mode when working on newborns. I like that I can use the yellow on the CURVES adjustment layer to work on taking the yellow out. Not everyone is comfy with this but for this tutorial that is what I am using. Go to IMAGE>MODE>CMYK. Next you will create a CURVES Adjustment layer just like above and choose YELLOW from the drop down.
From here you will want to select the middle point and drag DOWN. This will take the yellow out. Don’t get too crazy now. Eyeball it. I nudged it over to the left so my Output stayed at 51 and my Input is now 54. He looks a little pink now no?
No worries, just select MAGENTA now, select the middle point and nudge down. I nudged until my Output was 43 and Input was 50. He still looks a tad pink and slightly green but still no worries.
Now go to your layer, select the white mask and you can either paint back on with your black paint brush or you can lower your opacity. For this photo I wanted a mixture of yellow and pink so I lowered my opacity to 60%. FLATTEN your image. Once again, this is a step for personal preference. Some people like yellow babies, some like pink. I like in between.
NOW THE FUN PART!!!
Make sure to change back to RGB mode. IMAGE>MODE>RGB.
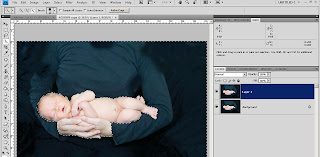
Duplicate your layer. For this I am going to use the QUICK SELECTION TOOL. Uncheck Sample All Layers and Auto Enhance. And select the middle with the + on it.
Click on any black area of mom and then start selecting all the black areas until there are marching ants around baby and mom’s hands. It should look like this:
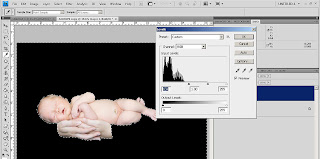
Next, this is what will change everything to black. Go to IMAGE>ADJUSTMENTS>LEVELS. Next you will want to select the BLACK arrow underneath the INPUT LEVELS and drag it until all of the selected area turns BLACK. For this image I dragged it to 104. Hit OK and now you will have an image where everything is black except baby and mom’s hands.
The next thing I do and I think gives your edges a nice blend from skin to black is to go to SELECT>REFINE EDGE and then slect the followind adjustments:
Radius: 68.6
Contrast: 0
Smooth: 41
Feather: 0.0
Contract/Expand: 0.0
But play with it and see what you like and what works best in blending for you. I also chose to look at it on the black on black so I can see the blend. Hit OK.
Now hit CTRL-D to remove your marching ants. You should have a pretty good looking image. Next zoom into 100% to make sure you edges blend well. If not, then you will want to select your eraser brush, take it down to 5-15% opacity and erase around the edges. Don’t go too much. Click on your eyeball to your layer to see what the original image looks like so you will know how much to erase. Once you are done with that then FLATTEN.
If you are satisfied with your image then save. I like to move my baby around a little so what I will do is DUPLICATE my layer by hitting CTRL-J at the same time. Then I will go to my background layer and create a NEW BLANK LAYER and fill it with BLACK. Then select your top layer and hit CTRL-T and then move my image to where I like it. I like tilts and this last part of this tutorial is how I do my tilts in my PP. Pretty much all of my babies are horizontal and then I just tilt them like this. You can even flip the top image horizontal if you’d like to position the baby the other way for some variation in pose direction. Whatever you want to do.
At the very end of my images is when I decide if I want to keep a color image colored or change it to black and white or to even run an artistic action on it. Also I do have and use Portraiture sometimes. For this image I did not use Portraiture but if I were to use it, this is where I would use it. It’s up to you. Some people use it on every single image. I don’t. I hoped to give you a way to edit images without using Portraiture. I realize it’s a preference.
For this image I am choosing to run an artistic action on it. I know most people HATE actions and feel like you aren’t a real photographer if you use actions. But some images I like to use them on. My favorite one is Paint the Moon’s Velvet Retro from the Picture Perfect Portrait Mega Set. Also this set gives you a few different skin actions so you don’t have to use Portraiture at all. And it’s cheaper!
I used Velvet Retro and left all of the pre-set opacities what they were and opened the folder and selected the RICHER CONTRAST and then flattened my image.
THE VERY LAST STEP IS…
Sharpening. This is how I sharpen my images.
Duplicte Layer
Change the duplicated layer opacity to OVERLAY (ugly, I know)
FILTER>OTHER>HIGH PASS
3.0
Zoom to 100% to make sure this is what you want your image to look like if you print. You can always lower the opacity of your layer or even add a mask and mask certain items back in. I use masks a TON but for this tutorial I wanted to keep it simple. I lowered my opacity to 85%.
FLATTEN
This is my final result:
I hope you enjoyed my tutorial. I know there are a lot of steps but once you get it down a few times it goes by SUPER FAST. I can get this image done in about 10 minutes if I am not interrupted. Please feel free to leave any comments or questions. Happy retouching!!!
